Native Android App Development: A Comprehensive Guide for Beginners
Are you interested in creating your own native Android app? Look no further! In this article, we will provide you with a detailed and comprehensive guide on native Android app development. Whether you are a beginner or have some experience in app development, this guide will walk you through the essential steps and provide you with valuable insights to help you succeed.
In today's digital age, mobile apps have become an integral part of our lives. With the increasing popularity of Android devices, developing native Android apps has become a highly sought-after skill. Native apps offer several advantages, including better performance, access to device features, and a seamless user experience. So, if you are ready to dive into the world of Android app development, let's get started!
Understanding Native Android App Development
In this section, we will provide an overview of native Android app development, explaining what it is and how it differs from other types of app development. We will explore the benefits of native apps and discuss when it is appropriate to choose this approach.
What is Native Android App Development?
Native Android app development refers to the process of creating applications specifically for the Android operating system using the native programming languages and tools provided by Google. Unlike cross-platform or hybrid app development, native apps are designed to take full advantage of the capabilities and features of Android devices. By using native development, you can ensure optimal performance, seamless integration with the platform, and access to a wide range of APIs and functionalities.
Advantages of Native Android Apps
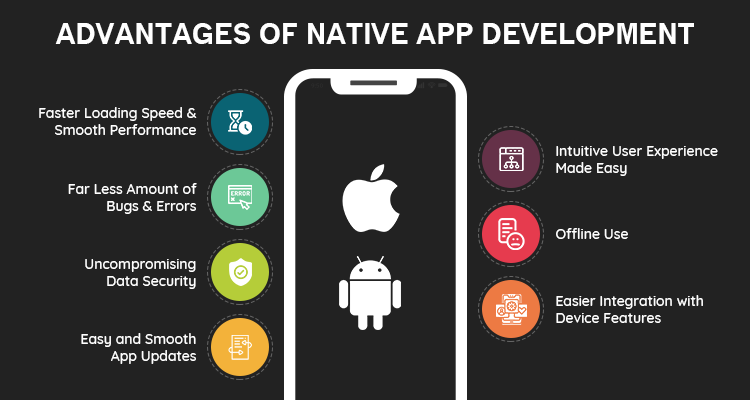
Native Android apps offer several advantages over other types of apps. Some of the key benefits include:
- Performance: Native apps are compiled directly into machine code, which allows them to run faster and utilize device resources more efficiently. This results in a smoother and more responsive user experience.
- User Experience: Native apps are designed to follow the platform's guidelines and design principles, providing users with a familiar and intuitive interface. This enhances user satisfaction and engagement.
- Access to Device Features: Native apps have direct access to the device's hardware features, such as the camera, microphone, GPS, and sensors. This enables developers to create more sophisticated and feature-rich applications.
- Offline Functionality: Native apps can store data locally on the device, allowing users to access and interact with the app even when they are offline. This is particularly useful for apps that require constant data synchronization.
- App Store Optimization: Native apps can take advantage of the Google Play Store's optimization features, such as app indexing, reviews, and ratings. This can help improve the app's discoverability and visibility.
When to Choose Native Android App Development?
While native Android app development offers numerous advantages, it may not always be the best choice for every project. Here are some scenarios where native development is recommended:
- Performance-Critical Apps: If your app requires high-performance graphics, complex calculations, or real-time data processing, native development is the way to go. Native apps have direct access to the device's resources, allowing for optimal performance.
- Device-Specific Features: If your app needs to utilize specific device features, such as the camera, GPS, or fingerprint scanner, native development is essential. Native apps have access to a wide range of APIs and functionalities that can be seamlessly integrated into your app.
- Complex User Interface: If you want to create a visually appealing and interactive user interface, native development provides more flexibility and customization options. Native apps can take full advantage of the platform's design guidelines and offer a smoother user experience.
- Long-Term Maintenance and Updates: Native apps are easier to maintain and update in the long run. As the Android platform evolves, native development ensures that your app remains compatible with the latest updates and features.
Setting Up Your Development Environment
Before you begin building your native Android app, you need to set up your development environment. In this section, we will guide you through the installation and configuration of the necessary tools, such as Android Studio and the Android SDK. We will also cover some best practices for organizing your project files.
Installing Android Studio
Android Studio is the official Integrated Development Environment (IDE) for Android app development. It provides a comprehensive set of tools and features to streamline the development process. Here's a step-by-step guide to installing Android Studio:
- Visit the official Android Studio website at https://developer.android.com/studio.
- Click on the "Download" button to download the Android Studio installer.
- Run the installer and follow the on-screen instructions to complete the installation.
- Once the installation is complete, launch Android Studio.
- Android Studio will prompt you to install the necessary SDK components. Follow the prompts to install the recommended components.
Configuring the Android SDK
The Android Software Development Kit (SDK) is a collection of libraries, tools, and resources that are required to develop Android apps. After installing Android Studio, you need to configure the Android SDK. Here's how:
- Launch Android Studio.
- Click on "Configure" at the bottom right corner of the welcome screen.
- Select "SDK Manager" from the dropdown menu.
- In the SDK Manager window, you can see a list of available SDK platforms, tools, and other components.
- Select the desired Android SDK version and click on the "Apply" button to install it.
Organizing Your Project Files
Properly organizing your project files is essential for maintaining a clean and manageable codebase. Here are some best practices for organizing your native Android app project:
Package Structure
The package structure is a way to organize your Java code files. It provides a hierarchical structure that helps in grouping related classes and resources. Here's an example of a typical package structure:
com.example.myapp├── activities│├── MainActivity.java│├── LoginActivity.java│├── SettingsActivity.java│└── ...├── fragments│├── HomeFragment.java│├── ProfileFragment.java│├── NotificationsFragment.java│└── ...├── adapters│├── RecyclerViewAdapter.java│├── ViewPager2Adapter.java│└── ...├── models│├── User.java│├── Product.java│├── Order.java│└── ...└── ...
Resource Organization
In addition to organizing your Java code files, it's important to properly structure your app's resources, such as XML layouts, images, and strings. Here are some tips for organizing your app's resources:
- Layouts: Create separate folders for different screen sizes and orientations, such as "layout," "layout-land" (for landscape orientation), and "layout-sw600dp" (for tablet screens).
- Images: Group your images by type or category. For example, create separate folders for icons, background images, and product images.
- Strings: Use separate string resource files for different languages. Create a folder named "values-en" for English strings, "values-es" for Spanish strings, and so on.
By following these best practices, you can ensure a well-organized project structure that is easy to navigate and maintain.
Understanding Java and XML in Android Development
Java and XML are the primary programming languages used in native Android app development. In this section, we will provide a brief introduction to Java and XML, explaining their roles in Android development. We will also discuss the basic syntax and concepts you need to know to start coding your app.
Java in Android Development
Java is a widely-used programming language that is the backbone of Android app development. It is an object-oriented language that provides a rich set of libraries and frameworks for building robust and scalable applications. Here are some key concepts and syntax you need to know when coding in Java for Android:
Classes and Objects
In Java, everything is based on classes and objects. A class is a blueprint for creating objects, while an object is an instance of a class. For example, if you are creating a messaging app, you might have a "Message" class that represents each individual message, and you can create multiple "Message" objects based on that class.
Methods and Functions
Methods (also known as functions) are blocks of code that perform specific tasks. In Java, methods are defined within classes and can be called to execute their functionality. For example, you might have a method called "sendMessage" that takes a message as input and sends it to a recipient.
Variables and Data Types
Variables are used to store and manipulate data in Java. Each variable has a data type, which specifies the type of data it can hold. Common data types in Java include integers, floating-point numbers, booleans, and strings. For example, you might have an integer variable called "age" to store the age of a user.
Control Flow Statements
Control flow statements allow you to control the execution flow of your code. Examples of control flow statements in Java include if-else statements, for loops, while loops, and switch statements. These statements help you make decisions, repeat actions, and handle different cases in your app.
Java Libraries and APIs
Java provides a vast collection of libraries and APIs that you can leverage in your Android app development. These libraries cover a wide range of functionalities, such as networking, database operations, user interface components, and more. Some popular Java libraries used in Android development include Retrofit for API calls, Glide for image loading, and Gson for JSON parsing.
XML in Android Development
XML (eXtensible Markup Language) is used for defining the user interface and other non-code resources in Android development. XML is a markup language that uses tags to define elements and their properties. Here are some key concepts and syntax you need to know when working with XML in Android:
Layouts and Views
In Android, you define the user interface using XML layouts. Layouts act as containers for various views, such as buttons, text fields, images, and more. Views are UI elements that users can interact with. XML layouts allow you to arrange and style these views to create the desired user interface.
Attributes
XML attributes are used to define properties and behaviors of XML elements. Each view or layout can have a set of attributes that control its appearance and functionality. For example, the "android:text" attribute is used to set the text content of a TextView, while the "android:layout_width" and "android:layout_height" attributes determine the size of a view.
Resource References
In XML, you can reference resources such as strings, colors, and dimensions using the "@" symbol followed by the resource name. This allows you to separate the content and styling of your app from its code. For example, you can reference a string resource by using "@string/app_name" to display the app's name.
Nesting and Hierarchical Structure
XML allows for a hierarchical structure, where elements can be nested inside other elements. This nesting creates a parent-child relationship, allowing you to create complex layouts and structures. For example, you can nest a Button inside a LinearLayout to create a button with a specific layout.
Getting Started with Java and XML
To start coding your native Android app, you need a basic understanding of Java and XML syntax. Here are some resources to help you get started:
Java Resources:
- Oracle's official Java documentation: https://docs.oracle.com/javase/tutorial/
- Codecademy's Java course: https://www.codecademy.com/learn/learn-java
- Udacity's Java for Android course: https://www.udacity.com/course/java-programming-basics--ud282
XML Resources:
- Android's official XML documentation: https://developer.android.com/guide/topics/ui/declaring-layout
- W3Schools' XML tutorial: https://www.w3schools.com/xml/
- Android Studio's layout editor: Android Studio provides a visual editor that allows you to create XML layouts without writing code. You can access it by opening a layout XML file and clicking on the "Design" tab.
By familiarizing yourself with Java and XML syntax and concepts, you will be well-equipped to start coding your native Android app.
Designing the User Interface
The user interface is a crucial aspect of any app. In this section, we will discuss the principles of good app design and guide you through the process of creating an intuitive and visually appealing user interface for your native Android app. We will cover topics such as layouts, views, and resource management.
The Importance of Good App Design
A well-designed user interface plays a vital role in the success of your app. It not only enhances the user experience but also reflects the professionalism and credibility of your brand. Here are some key reasons why good app design is essential:
User Engagement and Retention
A visually appealing and intuitive user interface encourages users to engage with your app and increases their likelihood of returning. By providing a seamless and enjoyable user experience, you can retain users and build a loyal user base.
Usability and Accessibility
A well-designed interface focuses on usability and accessibility, making it easy for users to navigate and interact with your app. Consider factors such as clear navigation, appropriate use of colors and fonts, and intuitive gestures to ensure that your app is accessible to users of all abilities.
Brand Identity and Differentiation
App design plays a crucial role in establishing your brand identity and setting your app apart from the competition. By incorporating your brand's colors, logo, and visual elements into the design, you can create a unique and recognizable app that aligns with your brand's values and personality.
Key Principles of App Design
When designing your app's user interface, it's important to keep in mind some key principles of app design. These principles will guide you in creating a visually appealing, intuitive, and user-centric interface. Here are some principles to consider:
Consistency
Consistency is crucial in app design. Use consistent colors, fonts, and visual elements throughout your app to create a cohesive and unified experience. Consistency helps users understand how to navigate and interact with your app, reducing confusion and improving usability.
Simplicity
Keep your app's design simple and clutter-free. Avoid overwhelming users with too many features or complex layouts. Simplify the user interface by focusing on essential elements and minimizing distractions. A simple and intuitive design allows users to accomplish their tasks efficiently and enhances the overall user experience.
Visual Hierarchy
Visual hierarchy refers to the arrangement and presentation of elements in your app's interface. It helps users understand the relative importance and relationships between different elements. Use size, color, spacing, and typography to establish a clear visual hierarchy that guides users' attention and emphasizes key features or actions.
Responsive Design
With the wide variety of Android devices available, it's important to design your app to be responsive and adaptable to different screen sizes and orientations. Ensure that your app's layout and elements adjust dynamically to fit different screen resolutions, aspect ratios, and device types. This will provide a consistent and optimized experience across various devices.
Creating Layouts and Views
In Android, layouts and views are the building blocks of your app's user interface. A layout acts as a container for views, while views represent the individual UI elements that users can interact with. Here's an overview of creating layouts and views:
Layouts
Android provides several types of layouts, each with its own characteristics and usage. Some commonly used layouts include:
LinearLayout
LinearLayout arranges views in a single row or column. You can specify the orientation (horizontal or vertical) and control the distribution and alignment of views within the layout.
RelativeLayout
RelativeLayout allows you to position views relative to each other or the parent layout. You can specify rules, such as aligning a view to the left or below another view, to create flexible and dynamic layouts.
ConstraintLayout
ConstraintLayout is a flexible layout that allows you to create complex and responsive layouts. It uses constraints to define the relationships between views, enabling you to create adaptive user interfaces.
Views
Views are the UI elements that users can interact with, such as buttons, text fields, images, and more. Android provides a wide range of built-in views that you can use in your app. Each view has its own set of properties and methods to control its appearance and behavior.
Button
Button is a basic view that users can click to initiate an action. You can customize its appearance and handle button clicks using event listeners.
TextView
TextView is used to display text on the screen. You can set the text content, apply formatting, and style the text using various attributes.
ImageView
ImageView is used todisplay images in your app. You can load images from local resources or from remote URLs, apply scaling and cropping, and handle image loading and caching.
EditText
EditText allows users to enter and edit text. You can customize its appearance, set input restrictions, and handle user input using event listeners.
RecyclerView
RecyclerView is a powerful and flexible view for displaying large sets of data. It efficiently recycles and reuses views as the user scrolls, improving performance and memory usage. You can create custom adapters to populate the RecyclerView with data.
Resource Management
Effective resource management is crucial for a well-designed app. Resources include images, strings, colors, dimensions, and more. Here are some best practices for managing resources:
Strings
Store all text strings in separate string resource files. This allows for easy localization and makes it simpler to update and manage the text content of your app. Use placeholders and formatting options to handle dynamic text.
Colors and Dimensions
Define colors and dimensions in separate resource files. By using resource references, you can easily update and reuse colors and dimensions throughout your app. This ensures a consistent look and feel and simplifies maintenance.
Images
Optimize your images for different screen densities and sizes. Provide multiple versions of your images in the appropriate drawable folders (e.g., drawable-mdpi, drawable-hdpi, drawable-xhdpi) to ensure that they look sharp on different devices.
Styles and Themes
Use styles and themes to apply consistent styling across your app. Define reusable styles for common UI elements, such as buttons and text views. Themes allow you to customize the overall look and feel of your app, including colors, fonts, and window styles.
Resource Organization
Organize your resources in a logical and structured manner. Use subfolders within the relevant resource directories to group related resources. For example, you could create separate folders for icons, images, and background assets.
By following these principles and best practices, you can design a visually appealing and user-friendly interface for your native Android app. Remember to test your designs on different devices and gather feedback from users to continuously improve the user experience.
Handling User Input and Events
Interactivity is key to a successful app. In this section, we will explore how to handle user input and events in your native Android app. We will cover topics such as handling button clicks, capturing user input, and responding to various gestures to create a dynamic user experience.
Handling Button Clicks
Buttons are one of the most common UI elements in Android apps. Handling button clicks allows users to trigger actions or navigate to different screens. Here's how you can handle button clicks in your app:
XML Layout
In your XML layout file, add a Button view and assign it an ID using the "android:id" attribute. For example:
Activity Code
In your activity code, find the Button view using the findViewById() method and set an OnClickListener to handle the button click event. For example:
Button myButton = findViewById(R.id.myButton);myButton.setOnClickListener(new View.OnClickListener() {@Overridepublic void onClick(View v) {// Handle button click here}});Button Click Logic
Inside the onClick() method, you can define the logic to be executed when the button is clicked. This can include navigating to another screen, performing a calculation, making an API call, or any other desired action.
Capturing User Input
Capturing user input allows your app to gather information from users to perform specific tasks. Here's how you can capture user input in your app:
EditText
EditText is the primary view for capturing text input from users. In your XML layout, add an EditText view and assign it an ID:
Activity Code
In your activity code, find the EditText view using the findViewById() method. You can then retrieve the user input using the getText() method:
EditText myEditText = findViewById(R.id.myEditText);String userInput = myEditText.getText().toString();
Input Validation
It's important to validate user input to ensure its correctness and prevent potential errors or crashes. You can use conditional statements or regular expressions to validate input. For example, you can check if a user-entered email address is in a valid format before proceeding with further actions.
Responding to Gestures
Gestures allow users to interact with your app through touch input. Android provides various gesture detection mechanisms that you can use to enhance the user experience. Here are some common gestures and how to handle them:
Click and Long Click
Click and long click gestures are common interactions in Android. You can handle these gestures by setting an OnClickListener or OnLongClickListener to the desired view. For example, to handle a long click on a TextView:
TextView myTextView = findViewById(R.id.myTextView);myTextView.setOnLongClickListener(new View.OnLongClickListener() {@Overridepublic boolean onLongClick(View v) {// Handle long click herereturn true; // Return true to consume the event}});Swipe
Swiping gestures allow users to perform actions such as navigating between screens or dismissing items. You can detect swipes using the GestureDetector class or by implementing the OnTouchListener interface. For example, to detect a swipe gesture:
View myView = findViewById(R.id.myView);myView.setOnTouchListener(new View.OnTouchListener() {private GestureDetector gestureDetector = new GestureDetector(getApplicationContext(), new GestureDetector.SimpleOnGestureListener() {@Overridepublic boolean onFling(MotionEvent e1, MotionEvent e2, float velocityX, float velocityY) {// Handle swipe gesture herereturn true;}});@Overridepublic boolean onTouch(View v, MotionEvent event) {return gestureDetector.onTouchEvent(event);}});
Pinch and Zoom
Pinch and zoom gestures allow users to scale and zoom in on content, such as images or maps. You can detect pinch and zoom gestures using the ScaleGestureDetector class. For example, to detect a pinch gesture:
View myView = findViewById(R.id.myView);ScaleGestureDetector scaleGestureDetector = new ScaleGestureDetector(getApplicationContext(), new ScaleGestureDetector.SimpleOnScaleGestureListener() {@Overridepublic boolean onScale(ScaleGestureDetector detector) {// Handle pinch gesture herereturn true;}});myView.setOnTouchListener(new View.OnTouchListener() {@Overridepublic boolean onTouch(View v, MotionEvent event) {scaleGestureDetector.onTouchEvent(event);return true;}});
Additional User Input Handling
In addition to handling button clicks, capturing user input, and responding to gestures, there are several other ways to handle user input and events in your app. Some examples include:
Checkbox and Radio Button
Checkbox and radio button views allow users to select options from a list. You can use the OnCheckedChangeListener to handle changes in the checkbox or radio button selection.
Spinner
Spinner is a drop-down list view that allows users to select an item from a list. You can use the OnItemSelectedListener to handle changes in the spinner selection.
DatePicker and TimePicker
DatePicker and TimePicker views allow users to select dates and times. You can use the OnDateChangedListener and OnTimeChangedListener to handle changes in the selected date or time.
SeekBar
SeekBar is a draggable slider that allows users to select a value within a range. You can use the OnSeekBarChangeListener to handle changes in the seek bar position.
Menu Items
If your app has a menu, you can handle menu item selections using the onOptionsItemSelected() method in your activity. This allows users to perform actions specific to the current screen or context.
By effectively handling user input and events, you can create a dynamic and interactive user experience in your native Android app. Experiment with different interactions and gestures to provide a seamless and engaging app for your users.
Working with Data and Storage
Most apps require some form of data storage. In this section, we will discuss different ways to store and retrieve data in your native Android app. We will cover topics such as working with databases, using SharedPreferences, and handling file I/O operations.
Working with Databases
Databases are commonly used to store structured data in Android apps. Android provides a built-in database management system called SQLite, which is a lightweight and efficient relational databasemanagement system. Here's how you can work with databases in your native Android app:
Creating a Database
To create a database, you need to define a contract class that specifies the structure and schema of your database. This class will contain constants for table names, column names, and SQL statements. Here's an example of a contract class for a simple database:
public class MyDatabaseContract {private MyDatabaseContract() {}public static class MyTable implements BaseColumns {public static final String TABLE_NAME = "my_table";public static final String COLUMN_NAME_TITLE = "title";public static final String COLUMN_NAME_DESCRIPTION = "description";}}
Creating a Database Helper
To manage your database, you need to create a subclass of the SQLiteOpenHelper class. This class will handle database creation, upgrading, and other operations. Here's an example of a database helper class:
public class MyDatabaseHelper extends SQLiteOpenHelper {private static final String DATABASE_NAME = "my_database.db";private static final int DATABASE_VERSION = 1;public MyDatabaseHelper(Context context) {super(context, DATABASE_NAME, null, DATABASE_VERSION);}
@Overridepublic void onCreate(SQLiteDatabase db) {String SQL_CREATE_ENTRIES ="CREATE TABLE " + MyDatabaseContract.MyTable.TABLE_NAME + " (" +MyDatabaseContract.MyTable._ID + " INTEGER PRIMARY KEY," +MyDatabaseContract.MyTable.COLUMN_NAME_TITLE + " TEXT," +MyDatabaseContract.MyTable.COLUMN_NAME_DESCRIPTION + " TEXT)";
db.execSQL(SQL_CREATE_ENTRIES);}
@Overridepublic void onUpgrade(SQLiteDatabase db, int oldVersion, int newVersion) {// Handle database upgrades and migrations here}}
Performing Database Operations
Once you have your database helper set up, you can perform various operations such as inserting, updating, deleting, and querying data. Here are some examples:
Inserting Data
To insert data into the database, you can use the insert() method of the SQLiteDatabase class. Here's an example:
MyDatabaseHelper dbHelper = new MyDatabaseHelper(context);SQLiteDatabase db = dbHelper.getWritableDatabase();ContentValues values = new ContentValues();values.put(MyDatabaseContract.MyTable.COLUMN_NAME_TITLE, "Sample Title");values.put(MyDatabaseContract.MyTable.COLUMN_NAME_DESCRIPTION, "Sample Description");
long newRowId = db.insert(MyDatabaseContract.MyTable.TABLE_NAME, null, values);
Querying Data
To retrieve data from the database, you can use the query() method of the SQLiteDatabase class. Here's an example:
String[] projection = {MyDatabaseContract.MyTable._ID,MyDatabaseContract.MyTable.COLUMN_NAME_TITLE,MyDatabaseContract.MyTable.COLUMN_NAME_DESCRIPTION};String sortOrder = MyDatabaseContract.MyTable.COLUMN_NAME_TITLE + " ASC";
Cursor cursor = db.query(MyDatabaseContract.MyTable.TABLE_NAME,projection,null,null,null,null,sortOrder);
while (cursor.moveToNext()) {long itemId = cursor.getLong(cursor.getColumnIndexOrThrow(MyDatabaseContract.MyTable._ID));String itemTitle = cursor.getString(cursor.getColumnIndexOrThrow(MyDatabaseContract.MyTable.COLUMN_NAME_TITLE));String itemDescription = cursor.getString(cursor.getColumnIndexOrThrow(MyDatabaseContract.MyTable.COLUMN_NAME_DESCRIPTION));
// Process retrieved data here}
cursor.close();
Updating Data
To update existing data in the database, you can use the update() method of the SQLiteDatabase class. Here's an example:
ContentValues values = new ContentValues();values.put(MyDatabaseContract.MyTable.COLUMN_NAME_TITLE, "New Title");String selection = MyDatabaseContract.MyTable.COLUMN_NAME_TITLE + " LIKE ?";String[] selectionArgs = { "Sample Title" };
int count = db.update(MyDatabaseContract.MyTable.TABLE_NAME,values,selection,selectionArgs);
Deleting Data
To delete data from the database, you can use the delete() method of the SQLiteDatabase class. Here's an example:
String selection = MyDatabaseContract.MyTable.COLUMN_NAME_TITLE + " LIKE ?";String[] selectionArgs = { "Sample Title" };int count = db.delete(MyDatabaseContract.MyTable.TABLE_NAME,selection,selectionArgs);
Using SharedPreferences
If your app needs to store simple key-value pairs, you can use SharedPreferences. SharedPreferences is a lightweight and easy-to-use storage mechanism provided by Android. Here's how you can use SharedPreferences:
Getting SharedPreferences
To retrieve an instance of SharedPreferences, you can use the getSharedPreferences() method of the Context class. Here's an example:
SharedPreferences sharedPreferences = context.getSharedPreferences("my_preferences", Context.MODE_PRIVATE);Writing Data
To store data in SharedPreferences, you can use the edit() method to get an instance of SharedPreferences.Editor. Then, use the various put methods to store key-value pairs. Finally, call apply() or commit() to save the changes. Here's an example:
SharedPreferences.Editor editor = sharedPreferences.edit();editor.putString("username", "JohnDoe");editor.putInt("age", 25);editor.putBoolean("isPremiumUser", true);editor.apply();Reading Data
To retrieve data from SharedPreferences, you can use the various get methods of the SharedPreferences class. Here's an example:
String username = sharedPreferences.getString("username", "");int age = sharedPreferences.getInt("age", 0);boolean isPremiumUser = sharedPreferences.getBoolean("isPremiumUser", false);Deleting Data
To delete a specific key-value pair from SharedPreferences, you can use the remove() method of the SharedPreferences.Editor class. Here's an example:
SharedPreferences.Editor editor = sharedPreferences.edit();editor.remove("username");editor.apply();Handling File I/O Operations
In addition to databases and SharedPreferences, you may need to work with files in your app. Android provides several options for file I/O operations. Here are some common tasks:
Writing to a File
To write data to a file, you can use the FileOutputStream class. Here's an example:
String data = "Hello, World!";try {FileOutputStream fos = context.openFileOutput("my_file.txt", Context.MODE_PRIVATE);fos.write(data.getBytes());fos.close();} catch (IOException e) {e.printStackTrace();}Reading from a File
To read data from a file, you can use the FileInputStream class. Here's an example:
try {FileInputStream fis = context.openFileInput("my_file.txt");InputStreamReader inputStreamReader = new InputStreamReader(fis);BufferedReader bufferedReader = new BufferedReader(inputStreamReader);StringBuilder stringBuilder = new StringBuilder();String line;while ((line = bufferedReader.readLine()) != null) {stringBuilder.append(line).append("\n");}fis.close();String data = stringBuilder.toString();} catch (IOException e) {e.printStackTrace();}Deleting a File
To delete a file, you can use the deleteFile() method of the Context class. Here's an example:
boolean isDeleted = context.deleteFile("my_file.txt");By working with databases, SharedPreferences, and file I/O operations, you can effectively store and retrieve data in your native Android app. Choose the appropriate storage mechanism based on the complexity and requirements of your app's data.
Integrating APIs and Services
To extend the functionality of your app, you can integrate various APIs and services. In this section, we will explain how to connect your native Android app with external APIs and services, such as Google Maps, social media integrations, and backend services.
Understanding APIs and Services
APIs (Application Programming Interfaces) allow different software applications to communicate and interact with each other. APIs provide a set of rules and protocols that define how different components of software can interact and exchange data. Services, on the other hand, are external platforms or systems that provide specific functionality or data to be consumed by other applications. By integrating APIs and services into your app, you can leverage existing functionality and data to enhance your app's capabilities.
Using Third-Party Libraries and SDKs
Many APIs and services provide official libraries or SDKs (Software Development Kits) specifically designed for Android app integration. These libraries and SDKs often include pre-built components, functions, and documentation to simplify the integration process. Before integrating an API or service, check if there is an official library or SDK available. Using these libraries or SDKs can save you time and effort, as they handle many of the complexities of API integration for you.
Authentication and Authorization
When integrating APIs and services, you may need to implement authentication and authorization mechanisms to ensure secure access to the resources. Depending on the API or service, you may need to obtain an API key, client ID, or access token to authenticate your app. This process typically involves registering your app with the API provider and following their authentication guidelines. Always follow best practices for securely storing and transmitting authentication credentials.
API Integration Steps
Hereare the general steps to integrate an API or service into your native Android app:
1. Research and Choose the API or Service
Identify the specific functionality or data that you want to integrate into your app. Research available APIs and services that provide the desired functionality and choose the one that best fits your requirements.
2. Read the API Documentation
Thoroughly read the documentation provided by the API provider. Understand the available endpoints, request/response formats, authentication methods, and any limitations or guidelines specified by the API provider.
3. Obtain API Credentials
If required, register your app with the API provider and obtain the necessary credentials, such as an API key or access token. Follow the instructions provided by the API provider to obtain and securely store these credentials.
4. Add Required Dependencies and Libraries
If the API or service provides an official library or SDK, add the necessary dependencies to your app's build.gradle file. Set up the required configurations, such as API key or client ID, in your app's configuration files. If no official library or SDK is available, you may need to manually handle the API calls using Android's built-in networking capabilities or third-party libraries, such as Retrofit or OkHttp.
5. Implement API Calls
Implement the necessary code to make API calls and handle the responses. This typically involves constructing the appropriate HTTP requests, sending the requests to the API endpoints, and parsing the responses. Use the provided documentation and examples to guide you in constructing and handling the API calls.
6. Handle Errors and Edge Cases
Handle potential errors and edge cases that may occur during API integration. Consider scenarios such as network errors, API rate limits, invalid responses, and authentication failures. Implement appropriate error handling and fallback mechanisms to ensure a smooth user experience and graceful recovery from errors.
7. Test and Debug
Thoroughly test your app's integration with the API or service. Test various scenarios, such as successful API calls, error conditions, and edge cases. Use logging and debugging tools to identify and fix any issues that arise during testing.
8. Optimize and Refine
Optimize your API integration code for performance and efficiency. Consider implementing caching mechanisms, request batching, or other optimization techniques to minimize network requests and improve overall app performance. Continuously monitor and refine the API integration based on usage patterns and user feedback.
Common API and Service Integrations
Here are some common API and service integrations you may consider for your native Android app:
Maps and Location Services
Integrate services like Google Maps to provide location-based features, such as displaying maps, geocoding addresses, and calculating routes. Use the Google Maps SDK for Android to access these functionalities.
Social Media Integrations
Allow users to authenticate with popular social media platforms, such as Facebook, Twitter, or Google, to enable social sharing, user profile integration, and friend lists. Implement the respective SDKs or APIs provided by the social media platforms.
Payment Gateways
Integrate payment gateways, such as PayPal, Stripe, or Braintree, to enable secure and convenient in-app purchases or transactions. Follow the documentation provided by the payment gateway provider to implement the necessary integration.
Analytics and Crash Reporting
Integrate analytics and crash reporting services, such as Google Analytics or Firebase Crashlytics, to gain insights into user behavior, track app performance, and monitor crashes and exceptions. Use the respective SDKs and tools provided by the service providers.
Cloud Services and Backend Integration
Integrate cloud services and backend platforms, such as Firebase, AWS, or Parse, to enable features like cloud storage, real-time data synchronization, user authentication, and push notifications. Follow the documentation and SDKs provided by the respective platforms.
Remember to respect the terms and conditions of the API or service provider, and ensure that you comply with any usage limits, licensing requirements, or data usage policies.
Testing and Debugging Your App
Before releasing your app to the world, it is essential to thoroughly test and debug it. In this section, we will guide you through the process of testing and debugging your native Android app, covering techniques and tools to ensure your app is stable and free from bugs.
Types of Testing
Testing your app involves various types of testing to ensure its functionality, usability, performance, and compatibility. Here are some common types of testing for native Android apps:
Unit Testing
Unit testing involves testing individual units or components of your app in isolation. It focuses on verifying the correctness of individual methods or functions. Use frameworks like JUnit or Mockito to write and execute unit tests for your app's code.
Integration Testing
Integration testing verifies the interactions between different components or modules of your app. It ensures that different parts of your app work together correctly. Use frameworks like Espresso or Robolectric to write and execute integration tests that simulate user interactions and test the integration of components.
User Interface Testing
User interface (UI) testing involves testing the visual elements and user interactions of your app. It ensures that the UI is displayed correctly, responds to user input as expected, and maintains a consistent user experience across different devices and screen sizes. Use frameworks like Espresso or UI Automator to write and execute UI tests.
Performance Testing
Performance testing evaluates your app's performance under different conditions, such as high user load or limited network connectivity. It helps identify performance bottlenecks, memory leaks, or excessive resource usage that may affect your app's responsiveness and user experience. Use tools like Android Profiler or third-party performance testing frameworks to measure and analyze your app's performance.
Compatibility Testing
Compatibility testing ensures that your app works correctly on different Android devices, versions, and configurations. It helps identify compatibility issues, missing dependencies, or device-specific bugs. Test your app on a variety of devices and Android versions to ensure broad compatibility.
Debugging Techniques and Tools
Debugging is the process of identifying and fixing issues in your app's code. Here are some techniques and tools to help you debug your native Android app:
Logging
Use the Log class to add logging statements in your code. Log messages can help you track the flow of execution, identify potential issues, and understand the values of variables or parameters at different points in your app. Use log levels (e.g., VERBOSE, DEBUG, INFO) to control the verbosity of your logs.
Debugging in Android Studio
Android Studio provides a comprehensive set of debugging tools to help you analyze and fix issues in your app. Use the debugger to set breakpoints, step through your code, inspect variables, and monitor the call stack. Android Studio also offers features like watches, conditional breakpoints, and memory profiling to aid in debugging.
Error Handling and Crash Reporting
Implement proper error handling and crash reporting mechanisms in your app. Use try-catch blocks to handle exceptions and prevent crashes. Additionally, integrate crash reporting services like Firebase Crashlytics or ACRA to automatically capture and report crashes, exceptions, and ANRs (Application Not Responding) to help you identify and address issues.
Using the Android Emulator
Test and debug your app using the Android Emulator provided by Android Studio. The emulator allows you to simulate different devices, screen sizes, and Android versions. Use the emulator's debugging features to replicate and debug issues on virtual devices.
Real-Device Testing
Test your app on real Android devices to ensure accurate behavior and performance. Real-device testing helps you identify device-specific issues, such as hardware compatibility, network connectivity, or performance variations. Use a combination of emulators and physical devices to cover a range of testing scenarios.
Best Practices for Testing and Debugging
Here are some best practices to follow when testing and debugging your native Android app:
Start Testing Early and Continuously
Begin testing your app as early as possible in the development process. Regularly perform testing throughout the development lifecycle to catch issues early and prevent them from snowballing into complex problems.
Create Test Plans and Cases
Develop a structured approach to testing by creating test plans and test cases. Define the scope of testing, expected results, test data, and test procedures. This helps ensure comprehensive coverage and consistent testing across different scenarios.
Isolate and Reproduce Issues
When you encounter a bug or issue, try to isolate and reproduce it in a controlled manner. Identify the steps or conditions that trigger the issue and document them. This makes it easier to understand and fix the problem.
Use Version Control and Branching
Utilize version control systems like Git to manage your app's codebase. Create branches for new features, bug fixes, or testing. This allows you to easily switch between different code versions and revert changes if needed.
Track and Prioritize IssuesUse an issue tracking system to keep track of bugs, feature requests, and other issues. Prioritize the issues based on their impact and severity. This helps ensure that critical issues are addressed promptly and efficiently.Collaborate with Testers and Users
Engage testers and users in the testing process to gather feedback and uncover potential issues. Encourage them to report bugs, provide suggestions, and share their experiences. This user feedback can be invaluable in improving the quality and usability of your app.
Perform Regression Testing
After fixing bugs or adding new features, perform regression testing to ensure that the changes have not introduced new issues or affected existing functionality. Re-run relevant test cases and validate that the app behaves as expected.
Automate Testing where Possible
Automate repetitive and time-consuming test cases to save time and improve efficiency. Use frameworks like Espresso, UI Automator, or Robolectric to automate UI tests, and tools like JUnit or Mockito to automate unit tests. Automating tests allows for faster execution and easier test maintenance.
Consider Edge Cases and Boundary Conditions
Think beyond typical use cases and test your app with edge cases and boundary conditions. This includes testing with minimum and maximum input values, low network connectivity, low battery levels, or unusual user behaviors. Covering edge cases helps uncover hidden bugs and ensures your app can handle unexpected scenarios.
Monitor and Analyze App Metrics
Monitor key performance metrics, such as app crashes, user engagement, and app responsiveness. Leverage analytics tools, crash reporting services, and performance monitoring solutions to gain insights into how your app is performing in the real world. Use these metrics to identify areas for improvement and prioritize bug fixes or feature enhancements.
Continuously Update and Improve Testing Strategies
Keep up with the latest testing techniques, tools, and best practices in the Android ecosystem. Stay informed about new features, updates, and changes in the Android platform that may impact your app's testing requirements. Regularly revisit and refine your testing strategies to adapt to evolving needs.
By following these testing and debugging practices, you can ensure that your native Android app is stable, reliable, and provides an excellent user experience.
Deploying Your App to the Play Store
Once your app is ready, it's time to share it with the world. In this section, we will explain the steps involved in deploying your native Android app to the Google Play Store. We will cover topics such as signing your app, creating a store listing, and optimizing your app's visibility.
Creating a Developer Account
Before you can publish your app on the Google Play Store, you need to create a developer account. Here's how:
1. Visit the Google Play Console website at https://play.google.com/apps/publish.
2. Sign in with your Google account or create a new one.
3. Follow the on-screen instructions to set up your developer account and provide the necessary details, such as your developer name and payment information.
4. Pay the one-time developer registration fee (currently $25 USD) to activate your account.
Preparing Your App for Release
Before uploading your app to the Google Play Store, ensure that you have completed the following steps:
1. Test Your App: Thoroughly test your app on different devices, screen sizes, and Android versions to ensure its stability and functionality.
2. Optimize Performance: Optimize your app's performance by minimizing resource usage, reducing app size, and improving battery efficiency.
3. Localization: If you plan to target users from different countries, consider localizing your app by translating the content and adapting it to the cultural preferences of your target audience.
4. Privacy Policy: Create a privacy policy for your app if it collects user data or uses third-party services that may require disclosure of data usage.
5. Compliance with Policies: Ensure that your app complies with Google Play Store policies, including content policies, monetization policies, and any other relevant guidelines.
Building and Signing Your App
Before you can upload your app to the Google Play Store, you need to build a release version of your app and sign it with a digital certificate. Here's how:
1. Generate a Keystore: Create a keystore file that will be used to sign your app. The keystore contains a private key that ensures the authenticity and integrity of your app. Use the Android Studio's Build > Generate Signed Bundle/APK option to create a keystore file.
2. Build a Release Version: Build a release version of your app by selecting the "release" build variant in Android Studio. This version is optimized for distribution and may have different configurations or optimizations compared to the debug version.
3. Sign Your App: Sign your app with the keystore file you generated. Provide the necessary details, such as the keystore file location, alias, and passwords, in the signing configuration dialog in Android Studio. This process ensures that your app is signed with a unique identity.
Uploading Your App to the Google Play Console
Once you have a signed and ready-to-publish APK file, you can upload it to the Google Play Console. Here's how:
1. Access the Google Play Console using your developer account credentials.
2. Select the "All Apps" tab and click on the "Create App" button.
3. Fill in the required details, such as the app's title, default language, and a short description.
4. Upload Your APK: In the "App Releases" section, click on "Manage Production" and then "Create Release". Upload your signed APK file and provide the necessary release information, such as version number and release notes.
5. Store Listing: Complete the store listing details, including screenshots, app icon, feature graphics, and promotional assets. Provide a compelling and informative description of your app to attract potential users.
6. Pricing and Distribution: Set the pricing and distribution of your app. Choose whether your app is free or paid, select the countries where it will be available, and configure any additional distribution options.
7. Content Rating: Complete the content rating questionnaire to determine the appropriate age rating for your app. This ensures that your app is suitable for the intended audience.
App Review Process
After submitting your app, it undergoes a review process by the Google Play Store team. The review ensures that your app meets the Google Play Store's policies and quality guidelines. The review process typically takes a few hours to a few days, depending on the complexity of your app. Once your app is approved, it will be available for download on the Google Play Store.
Optimizing Your App's Visibility and Performance
To maximize the visibility and success of your app on the Google Play Store, consider the following optimization techniques:
App Store Optimization (ASO): Optimize your app's title, description, keywords, and screenshots to improve its discoverability in the Google Play Store search results. Conduct keyword research and analyze competitor apps to identify relevant and high-ranking keywords.
Monitoring User Feedback: Pay attention to user reviews and feedback. Address user concerns, fix bugs, and continuously improve your app based on user feedback. Engage with your users and encourage them to leave positive reviews.
Promotion and Marketing: Develop a marketing strategy to promote your app through various channels, such as social media, app review websites, and online communities. Leverage your website, blog, or other online platforms to generate awareness and drive downloads.
Analytics and User Engagement: Integrate analytics tools like Google Analytics or Firebase Analytics to gain insights into user behavior, retention, and engagement. Monitor key metrics and use the data to optimize your app's features, user experience, and monetization strategies.
Regular Updates: Continuously update your app with new features, bug fixes, and performance improvements. Regular updates show that your app is actively maintained and improves its overall quality and user satisfaction.
By following these steps and optimization techniques, you can successfully deploy your native Android app to the Google Play Store and reach a wide audience of Android users.
Keeping Up with the Latest Trends and Best Practices
App development is a rapidly evolving field. In this section, we will provide tips and resources to help you stay up to date with the latest trends and best practices in native Android app development. We will discuss the importance of continuous learning and suggest ways to enhance your skills and knowledge.
Continuous Learning and Skill Enhancement
To stay ahead in the ever-changing world of Android app development, continuous learning is essential. Here are some tips to enhance your skills and keep up with the latest trends:
Explore Official Documentation: Regularly refer to the official Android documentation and guidelines provided by Google. The documentation covers various topics, including platform updates, best practices,and new features. Stay updated with the latest Android versions and APIs.
Participate in Developer Communities: Join online forums, discussion boards, and developer communities to connect with fellow Android developers. Engage in discussions, ask questions, and share your knowledge. Platforms like Stack Overflow, Reddit, and the Android Developer Community are great resources for learning and collaboration.
Attend Conferences and Meetups: Attend conferences, workshops, and local meetups focused on Android app development. These events provide opportunities to learn from industry experts, network with other developers, and gain insights into emerging trends and technologies.
Follow Industry Blogs and Publications: Follow influential Android blogs, websites, and publications that regularly publish articles, tutorials, and updates on Android app development. Some popular resources include Android Developers Blog, Android Weekly, and Medium.
Online Learning Platforms: Utilize online learning platforms like Udacity, Coursera, and Pluralsight to access courses and tutorials on Android app development. These platforms offer structured learning paths and provide hands-on exercises to enhance your skills.
Open Source Projects: Contribute to open-source projects or start your own. Collaborating with other developers on open-source projects allows you to gain valuable experience, learn from others, and showcase your skills.
Experiment and Build Personal Projects: Continuously challenge yourself by working on personal projects. Experiment with new technologies, frameworks, and design patterns. Building personal projects helps you apply your knowledge, discover new techniques, and expand your portfolio.
Stay Updated with Emerging Trends
Here are some trends and technologies to keep an eye on in the world of native Android app development:
Kotlin: Kotlin has gained popularity as an alternative programming language for Android app development. Stay updated with Kotlin's features, best practices, and integration with Android APIs.
Jetpack: Jetpack is a set of libraries and tools provided by Google to simplify Android app development. Keep up with new Jetpack components and architectural patterns to streamline your app development process.
Material Design: Material Design is Google's design language for creating visually appealing and consistent user interfaces. Stay updated with the latest Material Design guidelines and components to create modern and intuitive app interfaces.
Android App Bundles: Android App Bundles allow you to optimize app delivery by delivering optimized APKs based on the user's device configuration. Stay updated with the latest features and benefits of using App Bundles.
Machine Learning and AI Integration: Machine learning and AI technologies are increasingly being integrated into Android apps. Stay informed about the latest advancements in machine learning frameworks, such as TensorFlow or ML Kit, and explore their potential applications in your apps.
By continuously learning, exploring new technologies, and staying updated with emerging trends, you can enhance your skills as a native Android app developer and build innovative, high-quality apps.
In conclusion, native Android app development offers a world of opportunities for aspiring developers. By following this comprehensive guide, you will gain the necessary knowledge and skills to create your own native Android app. Remember, practice makes perfect, so don't hesitate to start coding and explore the endless possibilities of Android app development. Good luck!
Post a Comment for "Native Android App Development: A Comprehensive Guide for Beginners"